Weatherstripping & Caulking: Why, Where, and How

WHAT
Weatherstripping is used to create a tight seal between the moving parts of doors and windows. Whereas caulking is used to seal gaps between nonmoving parts of doors and windows (such as around frames) and other openings around the outside of your home.
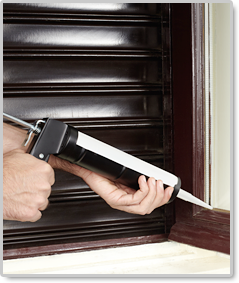
Weatherstripping is typically a foam-like or spongy material made into thin strips. And caulking materials are typically a paste-like substance, which comes in disposable cartridges for use with a caulking applicator (called a caulking "gun").
WHY
The un-sealed areas around doors and windows are the main cause of air leakage in most homes. Weather-stripping these areas can reduce your heating and air conditioning costs by as much as 30 percent. Adding weatherstripping and caulking are low-cost projects that can often pay for themselves in the first year, by saving you money on your heating and cooling costs.
Weatherstripping and caulking work by blocking air from coming into and out of your home, which makes your heating and cooling systems work harder. And even if your home was properly weatherstripped and caulked when it was first built, your home settles over time and construction materials will swell and contract, resulting in gaps to form. These gaps allow outside air to leak in and need to be sealed with weatherstripping and caulking.
WHERE
There are several methods for testing for where weatherstripping and caulking is needed around doors and windows: 1) on a cold, windy day feel with your hand from inside your home; 2) turning off your furnace and turning on all exhaust fans, and testing for air movement with an incense candle; and 3) shining a flashlight from outside on a dark night.
All doors leading outside should be weatherstripped, as should doors between heated (and air-conditioned) and unheated (and non-air conditioned) spaces inside of your home.
Caulking should be used on the outside of the house wherever two different construction materials meet (around door frames, window frames, chimneys, etc.). You should also be sure to check any places where pipes or wires penetrate the outside of your home (or to unfinished areas inside your home), and add caulking to seal the areas around these penetrations (helpful accessory: caulking compounds).
You should also install rubber gaskets behind outlet and switch plates on exterior walls, to help eliminate air leaks (see types, costs, and reviews of outlet rubber gaskets).
HOW
Before adding any weatherstripping, first, make sure the doors and windows are working properly. If they are crooked, they should be repaired before adding weatherstripping. Do not make weatherstripping so tight or windows and doors that they will not open and close smoothly. Properly installed weatherstripping on doors should seal well when the door is closed, while still allowing the door to open freely. When weatherstripping a door, the bottom of the door should be sealed, as well as the casings and the jambs. Weatherstripping for the bottom of the door can be installed on either the threshold or the door bottom, or both.
When deciding which weather-stripping materials to use, consider the price, how long it will last, and how it needs to be installed and maintained. A more expensive material may be a better buy because it will last longer and require less maintenance.
For locations which require caulking, you should use the highest quality caulking material suited for your job. It will be easier to apply, perform better, last longer, and require less maintenance.
The government supports improving energy efficiency of your home, so be sure to check to see if your weatherstripping or caulking project qualifies for any federal or state tax credits or rebates.
Related Articles . . .
Where Your Home Energy Dollar Goes
Ever wonder where your energy dollars go in your home? This article shows you at-a-glance, so that you can focus on the areas that will give you the biggest bang-for-the-buck for reducing your home energy bill.
Low-Cost Ways to Save Energy This Winter
Some energy-saving projects take several years to pay back the cost of doing them. But here are six ways to save energy this winter, that will save you more than their cost in just one heating season!
Preparing Your Home For Winter
Winter can be very hard on both your home and your pocketbook. This article gives you a checklist of things you can do to both protect your home, and to help reduce your energy bills this winter.
Why NOT to Get a Home Energy Audit
Having a home energy audit done by a qualified professional can show you how to reduce your home’s energy bill by up to a whopping 30%. But what are the reasons that you should NOT get a home energy audit?
Protecting Your Outside Water Faucets in Winter
If you live in a region where temperatures outside can go below freezing in the winter, this article and video shows how and why you should shutoff and drain the water completely out of your outside spigots before the winter.
Post-Winter Damage Control
Winter takes its toll on any house. This article and video describe the post-winter trouble spots that you will want to nip in the bud before they turn into bigger, more expensive problems later.


